Showing posts with label Halloween. Show all posts

Saturday, October 15, 2016

Printable How To Draw A Pumpkin Patch Worksheet.

This is a free how-to-draw-a-pumpkin patch lesson and printable worksheet. 

Here is a printable worksheet on how to draw a pumpkin patch that has many helpful tips that can take the young artist to the next level.

👇👇👇 SCROLL DOWN TO ACCESS THE FREE PDF.


If you like this project, you might also like How To Draw A Scarecrow Man.


How To Draw A Pumpkin Patch Worksheet.


If the photo file gives you trouble, the PDF will work better. 

👉👉👉 CLICK HERE for a file in a universal portable format, PDF.

If you have trouble printing  CLICK HERE to visit the how to print page for some suggestions or try one of the links to updated print files below. PRINT IN GREYSCALE SO YOU GET ALL THE SHADOWS.

YOU MAY PRINT THE PROJECT NOTES BELOW.

OVERVIEW
Do not get upset if the pumpkins are not perfectly round, in fact, they never are, so if your pumpkins are oval or lopsided it will be more realistic. The leaves on the pumpkin plant are huge so do not be afraid to draw them big. The leaves are on vines that have stems going up and the leaves grow on top of the stems.

BEGINNINGS
Draw lightly at first so you can erase later.

Start with a row of large circles for the basic pumpkin shape. In front of the large circles draw smaller ones of different sizes. It is more interesting if some pumpkins are in front of others. Have some leaning one way and some leaning another way, it makes it look more interesting.

LEAVES
The pumpkin leaves are like big floppy stars with rounded points. Draw the five or six lines for the veins down the center and off to the sides. The veins will look like fingers or a spider, so draw a line around the veins like a large glove around a hand.

VINES
The vines are each two lines that curl and loop around and go different ways. Start like a winding twisty scribble then draw a line on each side of the scribble to make it thick. It should come to a point.

DETAILS
Pumpkins have creases that go from the stem to the base. Do not draw too many. Remember to keep them curved. The stem is curved and wide at the base. Use rough texture on the stem.

ENVIRONMENT
Add a world, like a garden, cornstalks, or a fence. Use a rough scribble texture on the fence. Use a dark smudgy or dotty texture on the ground.

SHADING
Use shading technique to give the pumpkins some roundness, and to bring out the creases. Make the leaves darker than the pumpkins and the fence darker, make the soil the darkest.

Every picture should tell a story, can you guess the story in this one?

I am very excited that you are using my printable worksheets. You can also use the Paypal button to support my blog,  Thank you.

I hope you create a masterpiece!

(c) Adron D. 10/15/16


Thank you!

Sunday, October 18, 2015

How To Draw Dracula, Free Printable Worksheet

How to draw Dracula, a drawing lesson and worksheet.

 This free printable how to draw worksheet will help the young artist draw a picture of the Vampire Dracula.  This gives encouragement in drawing a face and hand and a few basics about character drawing.  This is perfect for Halloween.
In researching this project I combined features of different versions of Dracula. The ancient painting of Count Vlad Dracula III shows him with long hair and a big mustache. The idea of the hand grasping is from "Laurel and Hardy meets Dracula," the general face was inspired by Luke Evans' portrayal in "Dracula Untold."

If you have any problems CLICK HERE to visit my how-to-print page for some suggestions.

Below are links to alternate file formats for this image in case this one won't work for you.


How To Draw Count Dracula Worksheet.

Sometimes it takes me hours but I create these how to draw worksheets but I do it so that I can give back because I believe that when you have been given a gift it is so you can be a gift to others, and I hope these worksheets are a means of blessing to you Your gift will enable me to create more.

 
Thank you

To print in a universal portable format (PDF). CLICK HERE.

PRINTABLE PROJECT NOTES.


BEGINNING
Start by drawing lightly so you can erase later. To get a bony skull-like face draw a circle for the top of the skull and then draw a "U" out of straight lines for the jaw below.  Use a guideline going up and down the middle of the face to keep things even. Draw a line across the center for the eyes. The neck connects right below the curve of the jaw. The hand starts out as a stick figure hand with circles for the joints and lines for the bones.

DEVELOPING THE HAND
Give the fingers and hand thickness. Use ovals to give the fingers bent shapes then go around the ovals to define the fingers. At the base of the thumb is a large oval for the muscle in the palm. Don't forget the claw-like fingernails.

DEVELOPING THE FACE
Use straight lines wherever possible.
     * The eyes are a straight line for the top eye lid, then straight lines tilting down on either side.
     * The end of the nose is like a rounded "U" with short "(" ")" shapes on each side.
     * The mouth is almost straight across on the top and a curving line below.
     * Normally the eyebrows are last but they are a big feature of the face so draw them early.
     * The mustache is scribbled over the upper lip.
     * The ears are no lower than the nose.

DETAILING THE FACE
     * The eyebrows are bushy toward the middle and thinner at the outer edge. The look like a big "W" on his forehead.
     * There are a lot of wrinkles and worry lines on the face, especially around the eyes.
     * Outline the hair before you start to draw it in.
     * There are dark circles under the eyes.
     * There is a shadow below the nose and the jaw, below the cheek and above the eyes.

CLOTHING
Draw the clothing last. To make the face look light then make the cape dark,  The neck-scarf or ascot has a big jewel in it draw it like a hexagon with a smaller hexagon inside. The cape has laces that tie below the jewel. Make the cape black.

I hope you draw a scary masterpiece!

(c) Adron D. 10/18/15

Saturday, September 26, 2015

How To Draw An Angel Grieving At A Grave, Worksheet

How to draw a picture of an angel grieving at a grave: drawing lesson and worksheet.

This drawing lesson and printable worksheet are ideal for the classroom or at-home art time.  The angel is wrapped around a tombstone in an expression of grief. The lesson presents several challenges, as it involves a difficult and expressive pose. The theme is perfect for Halloween or a picture of loss. Parents and teachers will find numerous ways to incorporate this into class or as an additional take-home activity.

You do not have to make a donation to download my how-to-draw worksheets. However, if you'd like to, the donate button is located below the picture. Thank you for your gifts, prayers, memberships, and donations. I would not be able to create these without your support. 


SCROLL DOWN TO ACCESS THE FREE PDF.


 If you have problems printing, CLICK HERE to visit the HOW TO PRINT page for suggestions.

Printable How to Draw an Angel Grieving Worksheet by MrAdron.

Even though it takes hours, I draw these How to Draw Worksheets because I believe that when we have been blessed, it is so that we can become a blessing to others. I hope you enjoy these projects and they help you.


Thank You

Below is a file that may print better on some printers.

Some printers work better with a PDF file. To go to an image in PDF format,👉 CLICK HERE.👈

BEGINNINGS
Start by drawing lightly so you can erase later. Draw a cross for the tombstone.
To get the pose right, use an articulated stick figure with elbow, knees, hips, and shoulders. You may have to try a few times before you get it just right. Pose the figure around the cross or tombstone. Save the wings and robe for later.

DEVELOP FORM
Around the stick figure, draw the shape of the arms and legs, so they are rounded. The head is turned down, so you draw the top and hair, like two circles. The hand is a narrow curve like the letter "C" and hides the face.

ADDING DETAILS
The angel is holding a wreath. Draw it as a circle and fill in the circle with leaves and flowers.
The robe is simple; it has a belt at the waist but is flowing lines around the body.

FINISHING TOUCHES
The wings are not perfect since she is grieving. Add the feathers in rows. Make the background dark for contrast.

(c) Adron D. 9/26/15

Become a Patron!

Wednesday, October 29, 2014

How To Draw a Vampire Bat, Free Printable Worksheet

How to draw a vampire bat, drawing lesson, and printable worksheet.

The free printable drawing worksheet will be useful to parents and teachers in class and at home. It can be a stand-alone lesson or given out as a take-home project.

Learning to draw takes time and practice. If your project does not turn out perfect, do not get upset- keep on drawing, and you will be making beautiful pictures before you know it. I have a lot of projects so come back often and try some more.

Good Luck.

The free drawing worksheet and the project note below may be printed by highlighting them and sending them to your printer or saving them to your device to be printed later. 

Some printers work better with this type of image if you first drag it to your desktop and print from there. If you have problems printing,  CLICK HERE to visit the how to print page for some suggestions.

Remember to set your printer to greyscale so you get the shadows.

Printable How to Draw a Vampire Bat Worksheet. 


THANK YOU!

Note: use the gray-scale option in your printer if you have it or else the details will be lost.

Some printers work better with a PDF file. CLICK HERE to access the PDF.

PRINTABLE PROJECT NOTES


BEGINNING
Draw lightly so you can erase things later. Draw an oval for the body. Near the top draw a circle for the head. The circle and oval overlap a little.

BODY
Lightly draw the arms, the upper arm is short and then the forearm is long. The four fingers are very long. The legs are short. After you have the arms positioned then draw around the lines to give the arms and fingers thickness.

FACE
How to Draw A Vampire Bat
 Printable Worksheet, Free
Use guidelines like a cross on the face. The eyes are circles on the top of the cross guideline. The nose has two dashes like the letter "V," with an arch line above. The mouth is like a sideways diamond. Draw just a few teeth. The ears are big for the size of the head. The ears start where eyebrows would be and curve up and then down the side of the face.


DETAILS
There are tiny thumbs on each wing. The feet are small and are a couple of lines. put a little shiny dot in the eye. Use shading technique to make the bat have roundness. Use curving lines to finish the wings.

I hope this project is fun for you. I do not charge you for these How-to-draw worksheets, but they do take a lot time for me to design so if you are able will you please make a small contribution through the Paypal Button or the DONATE tab to support my art. 

Thank you

© Adron D, 10/29/14

Sunday, September 28, 2014

How to Draw a Haunted House Free Worksheet

This is a how-to-draw a haunted house drawing lesson and printable worksheet.

These old houses come in all shapes and sizes, so you do not have to copy my design exactly; you can just use it as a starting point for your own drawing.

You do not have to make a donation to download my How-to-Draw-Worksheets. However, if you'd like to support my work, the donate button is located below the picture.

If you have problems printing the worksheet, CLICK HERE to visit my how-to-print page for suggestions. Or try one of the updated links below. One may print better.


The printable worksheet on how to draw a haunted house is by Mr. Adron.


Sometimes, it takes me hours to create these how-to-draw worksheets, but I do it so that I can give back. When you have been given a gift, it is so you can be a gift to others, and I hope these worksheets are a means of blessing to you. You are welcome to print as many as you like.

Thank you!

If you liked this printable drawing lesson, you might also like How To Draw A Vampire Bat. CLICK HERE. 

Some printers work better with a PDF file. CLICK HERE to go to a PDF file.

PRINTABLE ART LESSON PROJECT NOTES


BEGINNING
Use basic shapes to make an interesting house. Draw lightly so you can erase later and experiment with the design. Some parts are in front of other parts like the porch or the tower. Show the house from the corner and have two sides. Don't worry about straight lines- in fact, if the lines are a little crooked it makes the house look older and more spooky.

DEVELOPING DESIGN
Add the windows and the doorway. Use guidelines to keep the tops and bottoms of windows all in a line if one is higher or longer it looks sloppy.

Add a line for the brick foundation and two lines that curve outward for the stairs

DETAILS
Add the roof shingles by drawing the letter "U" in rows. Add shutters by drawing long rectangles next to the windows, have some hanging crooked. Add a railing for the porch, Add the brick foundation with short thick sideways lines

FINISHING TOUCHES
Add a fence but have a few pieces falling down or missing. Draw flagstones in the sidewalk. Add bricks to the chimney the same as the foundation. Add a few dead trees on the side of the house. A few tombstones are always a good idea and a bat or black cat. and don't forget the moon.

Make the windows dark unless you are going to have a spooky green light coming from inside.

I hope it turns out to be a spooky masterpiece!

(c) A.E. Dozat. 9/28/14

How to Draw A Haunted House

Become a Patron!

Tuesday, October 22, 2013

Free How to Draw A Skull With a Candle on Top Worksheet

Free how to draw a skull with a candle drawing lesson and printable worksheet.

This printable drawing lesson is ideal for Halloween or a part of some dark scene. This simple treatment of the classic skull will help the young artist gain confidence. Parents, teachers, and homeschool families may print the worksheet below, and the project notes below for personal and class use.


Printable How to draw a skull and candle worksheet.


Sometimes, it takes me hours, but I create these how-to-draw worksheets. I do it so that I can give back because I believe that when you have been given a gift, it is so you can be a gift to others, and I hope these worksheets are a means of blessing to you. Thank you!

Some printers work better with a PDF file.  Click here for a link to a PDF file.

If you have problems printing,  CLICK HERE to visit the how to print page for suggestions.

YOU MAY PRINT THE PROJECT NOTES BELOW.


BEGINNING
The skull is almost round, so start with a circle. The view is turned slightly for interest so use a vertical guideline curving off-center to keep the angle right. The upper jaw is like a square below the circle.

THE EYE SOCKETS
The eye sockets are large and are about a third of the face. One eye socket is in full view; the other is partly hidden by the nose and cheekbone since it is turned away. The eye socket is not really a circle; the outer upper corner is slightly pointed. There is a ridge over the eye socket, show it by a shadow, and there is a ridge beside the eye shadow it in too.

NASAL
The nasal cavity (nose) is between the eyes and is like an upside-down "V" There is a thin bone inside sticking up.

TEETH
About eight teeth are showing. Use another guideline to keep them in a straight row. The two on the end are wide; the next one is pointed, then the rest are flat looking. The top of the teeth are rounded.

CHEEKBONE
Under the eye is the cheekbone; it goes back to the ear. Draw it as a shadow below and a shadow above.

CANDLE
The candle is a cylinder. The bottom is curved down and back up a little, the top is uneven, and there are blobs of melted wax on the side; they look like the letter "U," Don't overdraw the wax dripping down the skull, a few lines ending in a frozen drop will do. Have one drip hanging over the eye.

SHADOWS
Put dark shadow in the eye sockets and the nasal cavity. Use shadowing all around to make the skull look round. The skull is not smooth; there is texture, especially in the shadows, so use bumpy dotted marks to give it an old worn look.

FINAL TOUCHES
Make the background dark, so the skull looks white.
Have it sitting on a book; remember to keep all the lines parallel when drawing the book.

Illustration for How To Draw a Skull With a Candle on Top by MrAdron.

Draw a Skull With a Candle

(c) Adron D. 10/22/13

YOU CAN HELP

My how-to-print worksheets are free to print, and I hope you print as many as you need. Won't you please consider making a small contribution to support my blog? To make a one-time contribution, please click HERE TO DONATE and enter an amount that shows your appreciation.
Thank you. 

Sunday, October 13, 2013

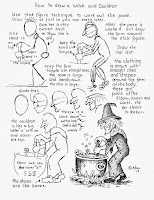
How To Draw A Witch And Cauldron Worksheet

How to draw a witch and a cauldron drawing lesson and printable worksheet.

This printable drawing worksheet is project will help the young artists to develop character and expression in their drawing.

Parents and teachers will find many ways to use this project to encourage young artists and give them confidence.


Printable How To Draw a Witch Worksheet.


Sometimes it takes me hours, but I create these how-to-draw worksheets I do it so that I can give back because I believe that when you have been given a gift, it is so you can be a gift to others, and I hope these worksheets are a means of blessing to you. Thank you!

Some printers work better with a PDF format. CLICK HERE to go to a copy in PDF

To print the worksheet above just highlight it and send it to your printer or save it to your device to print later. Some printers work better if you drag the image to your desktop and print from there. If you have problems  CLICK HERE to visit the how to print page for some suggestions. Below are some links to other file formats that may work if this one doesn't.

YOU MAY PRINT THE PROJECT NOTES BELOW.

TIP: save the fun stuff for last like the hat and the cauldron.

The challenge is to pose her as an old person stirring the pot so the hands show in a way that explains what she is doing.

BEGINNINGS
Use a stick figure technique to work out the pose so one hand is at the middle of the stirring ladle and the other is on top this way you show both hands. In the same way, put one foot behind the other.

The stick figure should have a very curved back since she is old. Use circles to indicate the location of elbows, shoulders knees, and hips.

After the stick figure is satisfactory draw the form around the lines.

FACE
We keep the face simple and use choppy straight lines to give it character. Lightly draw an oval for the head. Use a guideline halfway down going across to place the eyes, another guideline halfway between the first guideline and the chin for the mouth.
     * The nose is large and bends down. The upper lip is two lines like a < under the nose.
     * The lower lip is like the letter C.
     * The mouth is two straight lines the first going back and the second short one tips up.
     * The chin is long and sticks down, it is three or four straight lines going down under and back.
     * The eye is looking down, the eyelid is one line curving down like an upside-down rainbow with a half-circle near the nose for the eye.
     * Put wrinkles under the eye, and outside the eye, outside the mouth, and under the cheek.
     * Don't forget a few warts and stray hairs on the chin.
     * Draw the hair last as a few straight lines going outward.

HANDS
Keep the hands simple. Use straight lines. The lower one is closer to the viewer and the back of the hand is drawn as a square with three short lines that indicate the fingers. The thumb is on the top and goes behind the ladle.
The far hand is on top of the ladle. Draw the thumb inside toward the witch and the fingers on the far side.

SHOES
She wears boots, draw them like boxes on her feet with rectangles for the heals.

CAULDRON AND CLOTHING
Now the fun and easy stuff. The cauldron is a half-circle with an oval for the top. It is on logs that are circles on the ends of rectangles. The fire is wiggly lines. Make the cauldron dark so the fire shows up. Use shading technique to give it roundness, by making the edged darker than the center.

Draw the clothing with straight lines and drape the clothing around the form by drawing around the stick figure. There will be wrinkles and folds where the elbows, waist and knees create angles in the clothing. The far sleeve is in shadow so it looks away from the near sleeve. Give her a scarf or shawl on the shoulder draping down the back or front.

I hope you create a masterpiece!

(c) Adron D. 10/13/13
How To Draw A Witch

Monday, October 8, 2012

How To Draw A Pumpkin. Worksheet and Lesson.

How to draw a pumpkin. 
This free printable drawing worksheet, How to Draw a Pumpkin, is easy and with a few details can turn out very good.


FIRST A WORD OF ENCOURAGEMENT:  If your drawings do not turn out the way you were hoping do not give up, learning to draw takes practice. Draw every day and soon you will be making beautiful pictures. Come back to this blog often and try some of my other projects.

PRINT THE WORKSHEET
You may print the worksheet below by highlighting it and sending it to your printer or saving to your device and printing later. Some people have better luck b dragging it off to the desktop and printing from there. If you have problems CLICK HERE to visit the how to print page for some suggestions. Below the image are links to alternate image files.

NOTE; use greyscale if your printer has that option so you get the benefit of the shading.


Printable how to draw a pumpkin worksheet

Sometimes it takes me hours but I create these how to draw worksheets but I do it so that I can give back because I believe that when you have been given a gift it is so you can be a gift to others, and I hope these worksheets are a means of blessing to you.


Thank you!

Some printers work better with a PDF file. 

For a PDF file CLICK HERE.

PRINTABLE PROJECT NOTES.

Pumpkins are round but not a circle. Draw the outline as a lopsided circle with the bottom mostly flat. Draw a second pumpkin outline in front of the other. These outlines can be a little lumpy shaped but don't overdo it.

The stem is not at the very top but a little lower, this gives perspective to the pumpkin. The stem is rough so draw it with little short choppy lines. Add shading to the shadow side with short choppy marks made with the "cheek" or side of the pencil. Do not shade in the top cut off part, it remains white. The bottom of the stem has little bumps like toes, sketch them in like circles with a shadow on one side.

The pumpkin has creases or folds in the sides. These creases are shaped like a bow without the string or arrow,  they start at the top then bend outward and then back into the bottom where they might touch. These creases often are a shadow but will have a highlight on the outside edge next to the shadow.

Remember to leave the highlights where the light is shining on the side of the pumpkin. Lightly outline the highlights before shading the shadow side of the pumpkin.

The shadows make it look round and real. Shadows come in very dark, dark, and gray. Do the very dark first at the bottom and the side away from the light. Then add the dark around the very dark and last lightly fill in everything else with the gray- but keep the highlights pure white. Leave a little highlight between the pumpkins to help show they are separated.

A shadow on the table and the wall behind the pumpkin will make it look like it belongs somewhere.

I hope you create a masterpiece!

(C) Adron D. 10/18/12

Tuesday, October 2, 2012

How To Draw A Scarecrow Man Worksheet

How to Draw A Scarecrow.

How to draw a scarecrow art lesson.

This free printable drawing worksheet, How To Draw A Scarecrow, is an easy drawing project for a young artist or a beginner. Very few rules apply since a scarecrow man is made out of rags and straw, so if an arm or leg is too long that is OK because after a few days in the weather it gets roughed up.

My how to draw lessons are free and I hope you print as many as you can use. If you are able won't you please consider making a small contribution to support my art? Your gift will tell me you appreciate my worksheets. CLICK HERE TO DONATE
Thank you. 


How to draw a scarecrow worksheet, (enhanced image)


Even though it takes hours, I create these How to Draw Worksheets because I believe that when we have been blessed it is so that we can become a blessing to others. I hope you enjoy these projects and they help you. 


Thank you!

Below are some files that may work better on some devices. 

Some printers work better with a PDF image file, CLICK HERE. 


PRINTABLE PROJECT NOTES

Quickly scribble out a basic design. It starts like a stick figure with wide shoulders, then dress the stick figure in coveralls and shirt. The hands are a little lower than halfway down. Have some straw sticking out of the cuffs of the shirt and the bottom of the pants.

The head is just a circle with a happy face drawn on it. Sketch a handkerchief around the neck; it is like two triangles, a circle for the knot, and a scribble for the ends.

The hands are just gloves stuffed with straw so they do not have the correct shape. You can scribble them out and then color them in dark.

The shoes look like peanuts with laces. Just draw the peanut shapes then make sure the bottom is flat. Draw some "Xs" for the crisscross laces.

The hat is maybe the hardest part. Draw a rectangle for the top then draw two curving lines for the brim; one curving line goes across the front and dips down on the outside edges, the second is in two parts, one on each side of the head halfway down, this is for the back brim of the hat and will curve up to touch the tips of the front line that curves down.

The pole is two dark lines going from the ground up to his back.

Draw his world by scribbling across the ground with light and then dark pencils. Draw the field as long lines going up and down but topped with short choppy lines for the tops of the grain. Draw the farm and hills very simply so the attention is on the scarecrow man.


Illustration, how to draw a Scarecrow 

I hope you create a masterpiece!
 (C) Adron D.10/2/12

Tuesday, September 20, 2011

How to Draw a Black Cat on a Fence

This is a free how to draw a black cat on a fenceWorksheet and drawing lesson.


It is a free printable worksheet that makes drawing a cat easy. If you make a mistake, just go over it and make it a black cat.

If you have any problems making the image below print, CLICK HERE to visit my how-to-print page for some suggestions.


How to draw a cat worksheet. (c) Adron 2011

These worksheets are free to print but your gift will help keep this blog going


Thank you!

BEGINNING
Start with the body by drawing a rectangle. Below that rectangle, draw a guideline for the top of the fence. The neck is a large triangle. Start the head with a medium circle halfway over the neck triangle the muzzle or nose is a smaller circle at the bottom of the head circle.

The hind leg is like a half-circle, and two lines going down, they are closer at the paw than at the knee. The other hind leg is almost the same. The front legs are straight lines but narrower at the paw. Make sure the paws meet the top of the fence.

DETAILS
The ears are triangles on top of the head, and they point forward.  Erase the extra lines

The tail is up but not perfectly straight so give it a curve. The shoulder and hip are slightly arched.

COLORING
Don't color him black too grey, so then you can add black for the darker shadow. I didn't draw the whiskers since he is so small in my drawing; if you draw on a large paper you have more opportunity to add detail.

Finish the fence and add the background. You don't have to put him on a fence; you can just as easily draw him walking on a tree branch or top of a car or the kitchen counter.

Have fun.

I did this drawing with markers. Some of the markers were fine-tipped, and some were broad. I use some markers that are light grey, medium grey, and dark grey. When you use a variety of pens it makes a more interesting picture. I kept the background simple, so the cat is the focus. I was thrilled with the fence since I shaded around it so the fence will look white.


Example of how to draw a cat on a fence. (c) Adron  2011
(c) Adron